
My Mesh Tube Necklace

A while ago I was contacted by Auntie's Beads. They offered me some stuff for some add space. Of course I was up for that... go ahead and check them out!
I'll show you what I chose with my money as we go, and I continue to create. Today I'm sharing this mesh tube necklace that I made. Have you ever made jewelry?
It has been a longggg time since I've made jewelry. I had to clear a spot for myself on my cluttered desk, clean off hair accessory creations!
It always takes me a minute to get my creativity going, especially when I'm shifting gears. I found this too when I recently sat down to scrapbook.
Once I got going I was just fine! It all comes back!
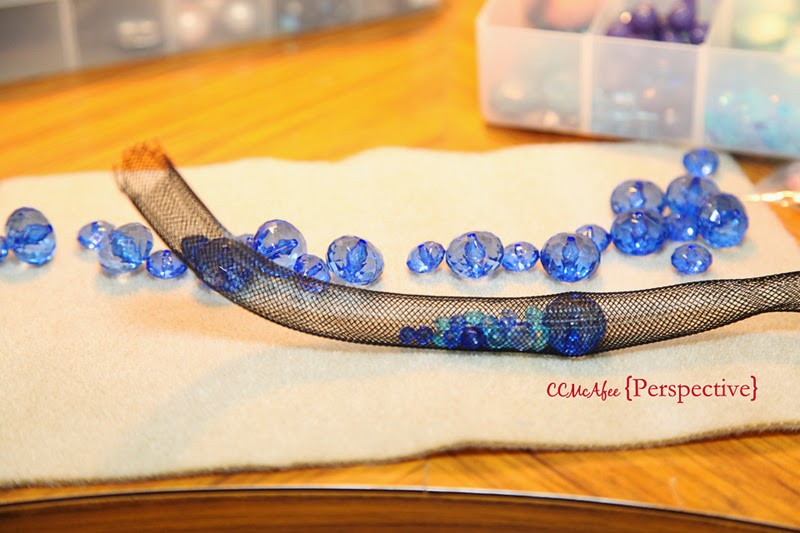
The first thing in my shopping cart was this mesh tubing.
I've never worked with it, but have seen it. What better time to give it a try, then when you get it for free?
I still would like to work with metal mesh, I think it's beautiful, comes in a ton of colors, has more weight to it.
One think I'd like to do with the mesh is cover larger beads. I imagine the metal forms around the beads more so than this does. It doesn't really work well for that, doesn't hold it's form.
But, filling it with pretty beads... that works just fine!
Here is the mesh tubing. It reminds me of those Chinese Finger Traps. As you stretch it out the tube gets skinny, and you can push it together to make the tube wider.

I thought I'd use blues on the inside of the tube, but my larger beads are all plastic. My little glass beads don't provide enough weight for the mesh to really hang and pull down.
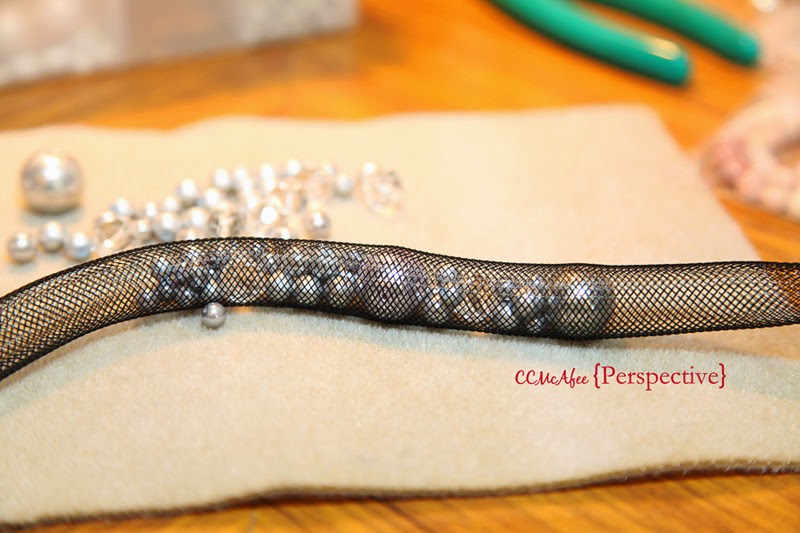
So I chose to go with gray glass pearls with crystals. These offer more weight, which pulls the mesh down nicely.

I started with a larger bead, then filled randomly with smaller pearls and crystal. I added another large bead, then continued with small beads.

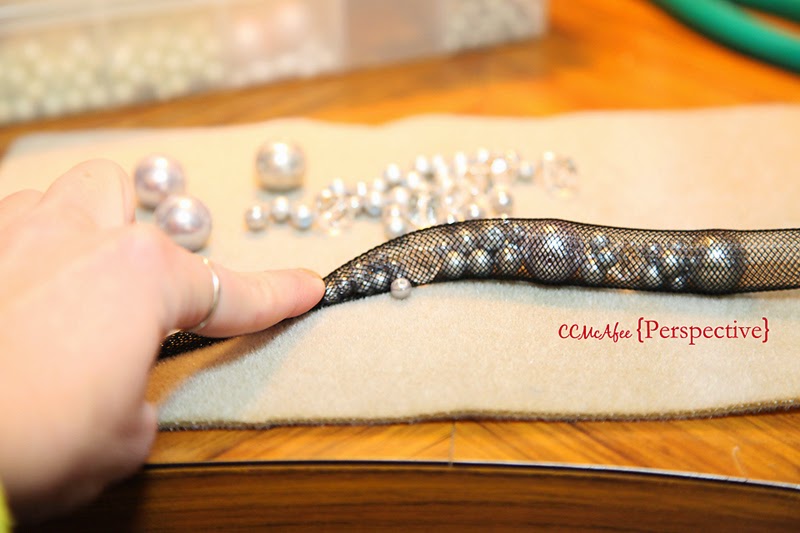
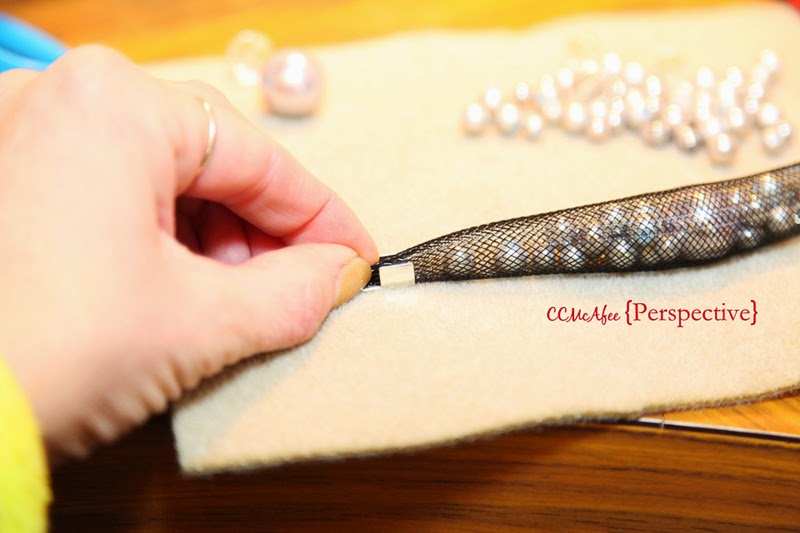
You can see in this photo that if you sort of taper the amount of beads near the ends the mesh will close nicely.
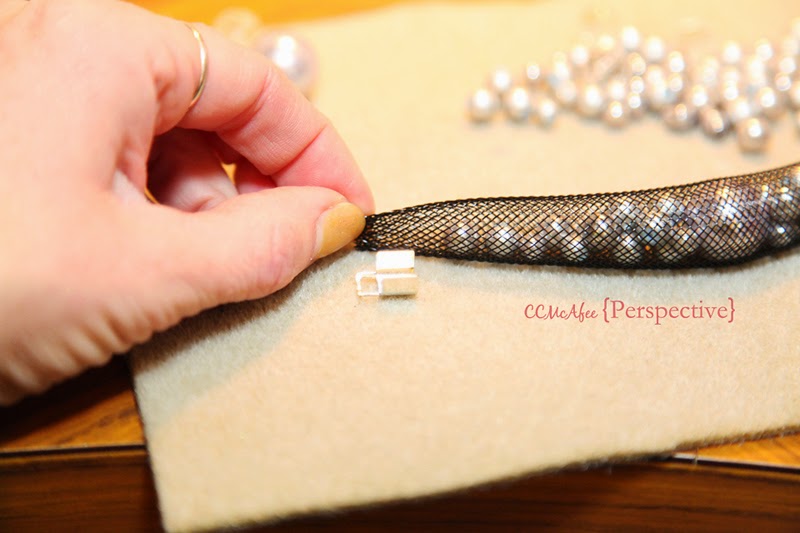
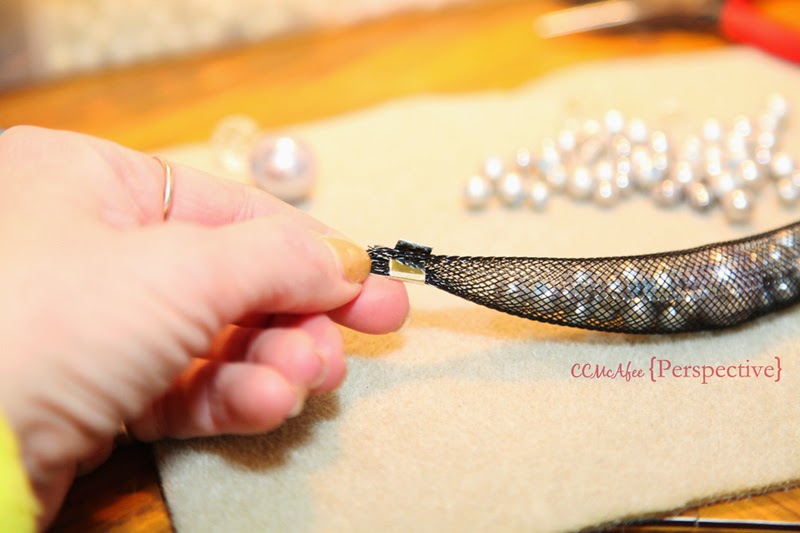
I used 'fold over cord ends' to close my ends.
Words of wisdom...
- Try to keep the base of this as flat as you can. If it curves you can't smash the mesh as well and it will slip out... I found that out the hard way!
- Take the opportunity to smoosh that first flap really good before moving onto the second. I figured it out after my third try! That mesh kept slipping out!
- I wish I'd done it on my first side, (but that one seems to have stuck) but on the second side I went ahead and put a dot of E600 glue on before closing the sides. Extra glue should help right? It does so far!


Now options to hang your necklace. I decided between black chain, silver chain and ribbon.
I thought ribbon would be my choice even before starting the necklace.
I went with it.
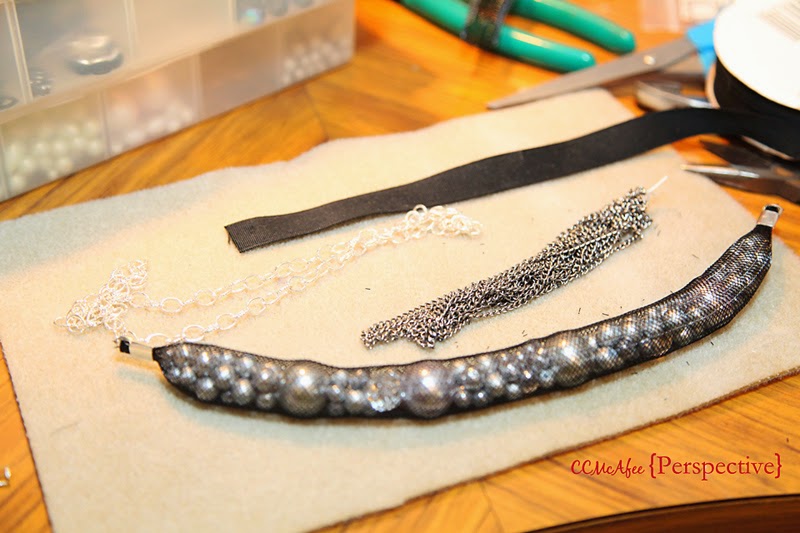
I chose a sturdy grosgrain ribbon and strung it through the opening.

I tied a double knot, really tight...

... then glued down the end (onto the metal) with hot glue.

And here we are...
Cute right? I think so.
This has started a wave of jewelry making. I'll ride it while it's here!
