
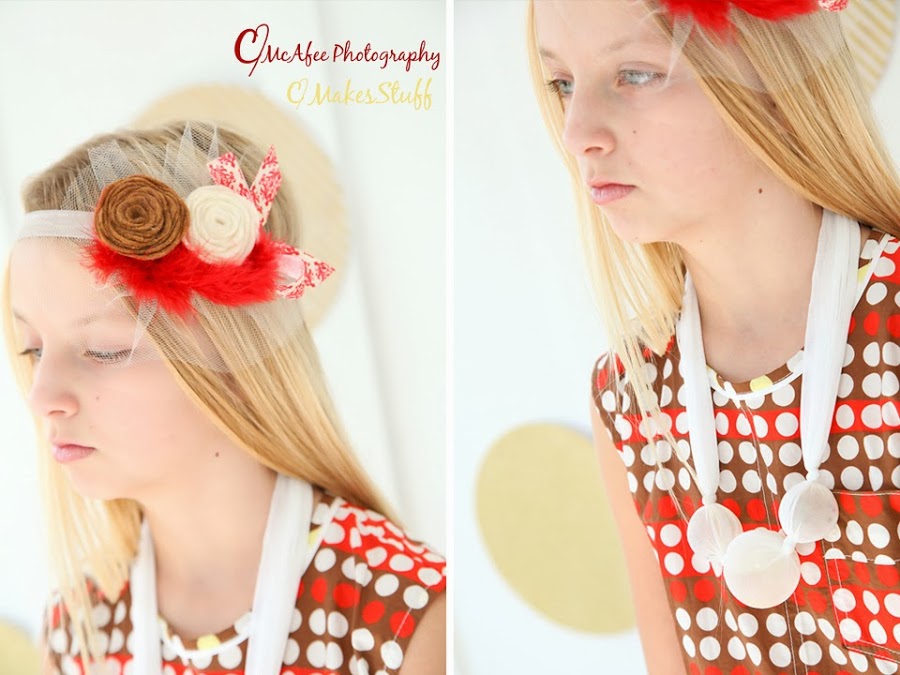
Felt Flower Tutorial
As promised from yesterday's shoot, here is a tutorial on how to make these cute felt flowers.
You can use them to decorate with, or put them on a hat, make a headband with them...

I'm sure there are a million tutorials out there, but since I recently made some for Q's head band, I figured I'd show you, in case you are new to the scene!
These flowers are great for fall and winter because they are made with felt. When choosing colors for these flowers I'd go with deeper colors. It looks odd having bright summer colors with the heavy weight of felt... just my .02. Do as you will!
You can make these any size. I did these flowers with about a 5 inch circle.
First I cut a square out of my felt... because I'm weird like that and don't like circles cut into my felt!
AND, it's easier to cut a circle out of a square, than to just go blind into your big ream of felt!

This does not have to be a perfect circle, just eyeball it! No time for tracing and cutting here. I normally cut more than one piece of felt at a time... as long as I'm doing the work, may as well make a couple!

Now start cutting into your circle like a spiral. Keep in mind your width. The skinnier your strips the more flat your flower will lay. The larger, the more proud.
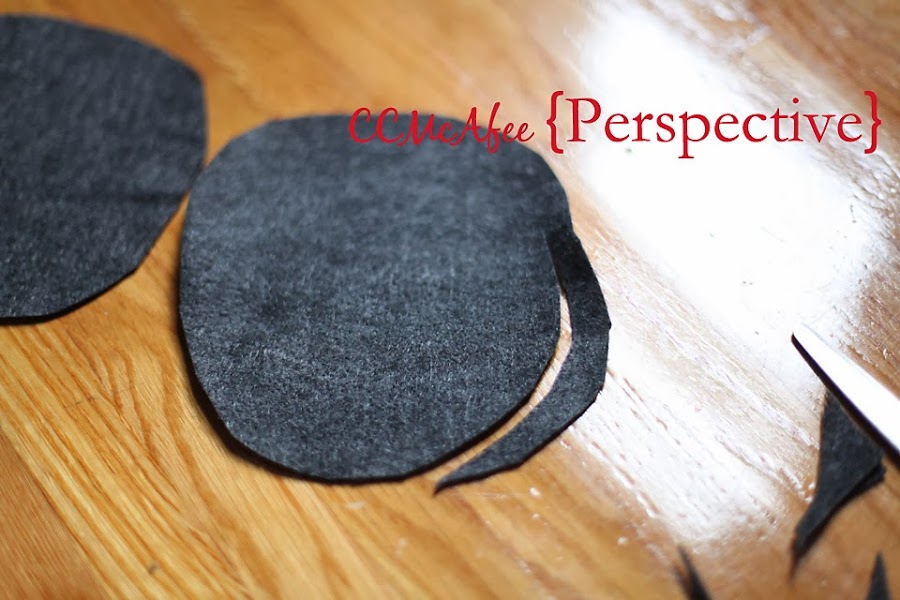

You can also cut in wavy lines around your circle. This will make your flower look like it has petals, rather than the flat faced flower. I'll show you both of them at the end.

Now take that center piece and turn it in tight to start. You will start wrapping the flower on the outside of that little start.

Take your trusty glue gun and put a dab on the back of that start.

Continue wrapping around the outside and glue as you go. I'd glue pretty often so nothing falls through.
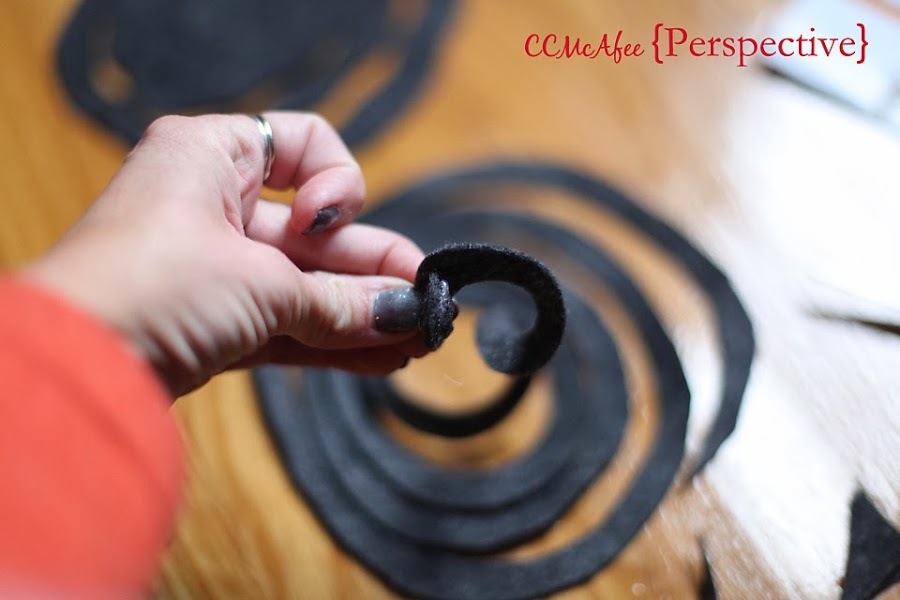


Pay attention to how you are wrapping. If you start to wrap down the center will poke up. Try to keep it nice and even and flat.

There you have it!

Here is the second one wrapped as well. You can see the one on the left stands taller and is more uneven on the top. Both are great... options are nice!

Also from yesterday... easy photo backdrops.
I was inspired by the dots on Q's dress, therefor dots as the background.
I simply cut out patterned paper and stuck them onto the wall, paying attention to where I'd have her stand.
Another great backdrop option are blankets. Seriously! They aren't that expensive compared to vinyl. You have to be careful with wrinkles and keeping things straight, but they are good option, especially if you intend to blur your background.
